Using the Web API in AIMS
- Step 1
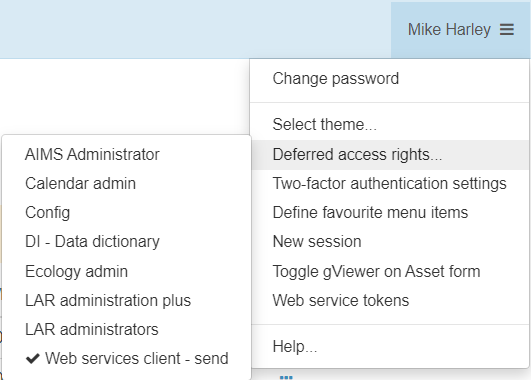
- Locate the burger bar at the top right of the page next to your name. Click it and hover over Deferred access rights... to reveal a list of deferred rights to choose from. Select 'Web services client - send'.
- Step 2
- Locate the new menu item on the header bar called Web services test client
- Step 3
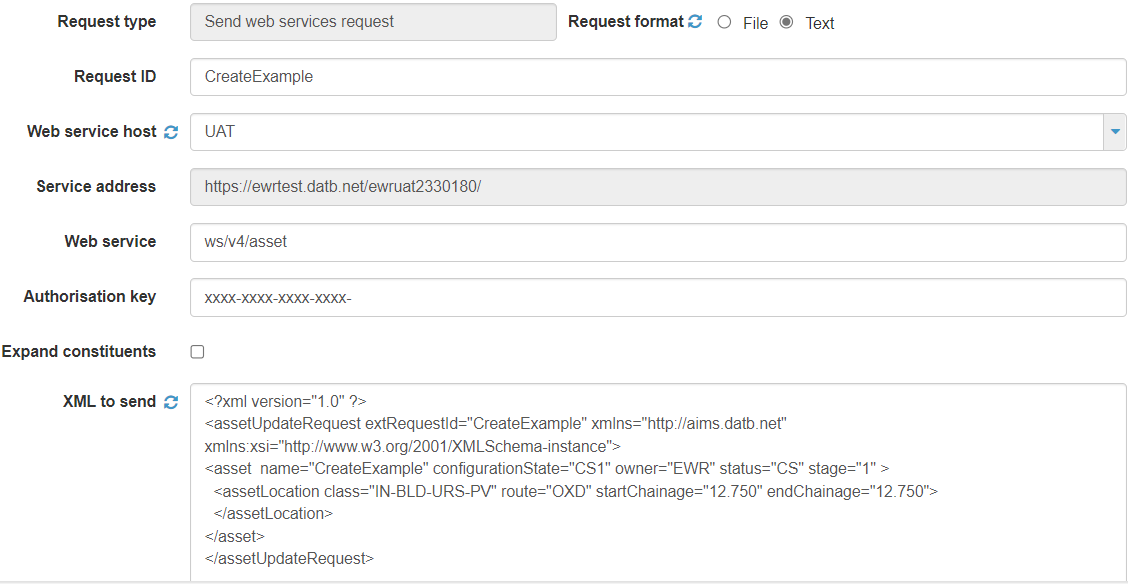
- Locate the plus button and populate the parameters as shown in the image making sure you replace the personal authentication key with the one you were provided with

Using the Web API with postman
- Step 1
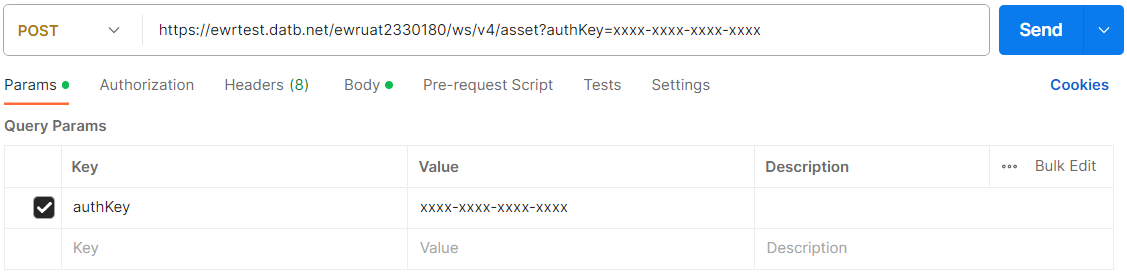
- Launch postman and add the authKey value that you were personally provided.
- Step 2
- In the body tab ensure the raw option button is selected and the body type is set to text (even though we will be sending XML). Then paste the XML of the new asset in the body text ensuring you've captured all the mandatory data
